Google workspaces SAML Authentication with Cognito
There are two major steps in setting up Google Workspace SAML authentication.
-
Create Groups
-
Setup SAML application.
These two steps require the user to login to Google Workspace as an admin user
-
Create Groups
PaladinCloud has 4 roles
-
AccountManager
-
ReadOnly
-
TechnicalAdmin
-
SecurityAdmin
Need to create 4 Groups as shown below.
Directory – – > groups – – > create group
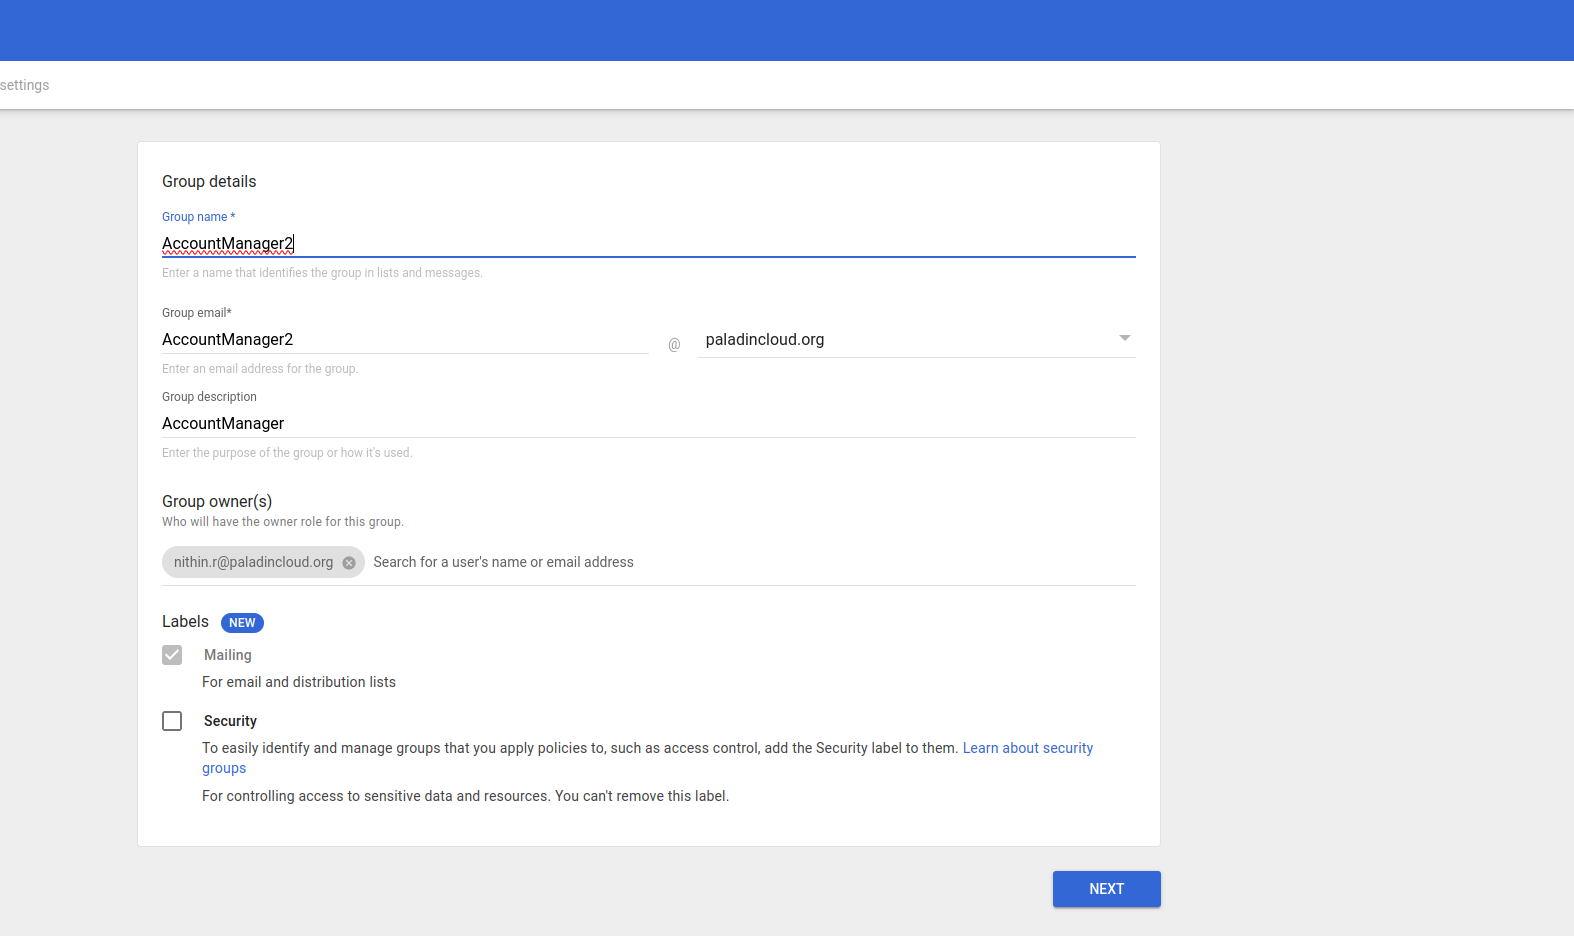
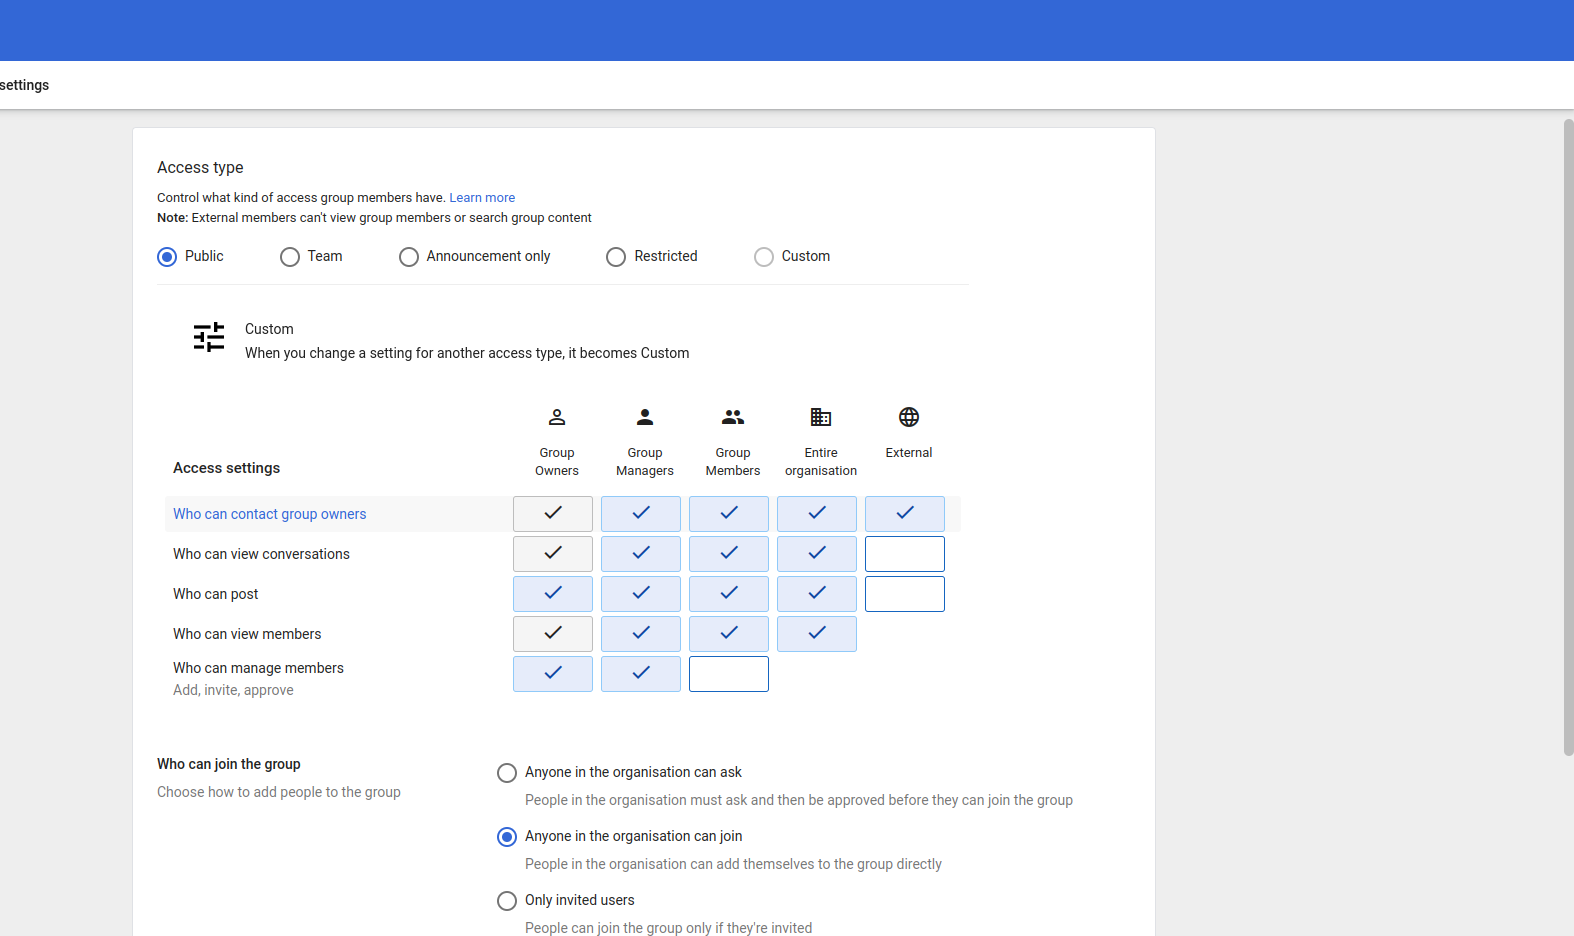
Click next and choose public and anyone in the organization can join and click on Create group
-
Create SAML App
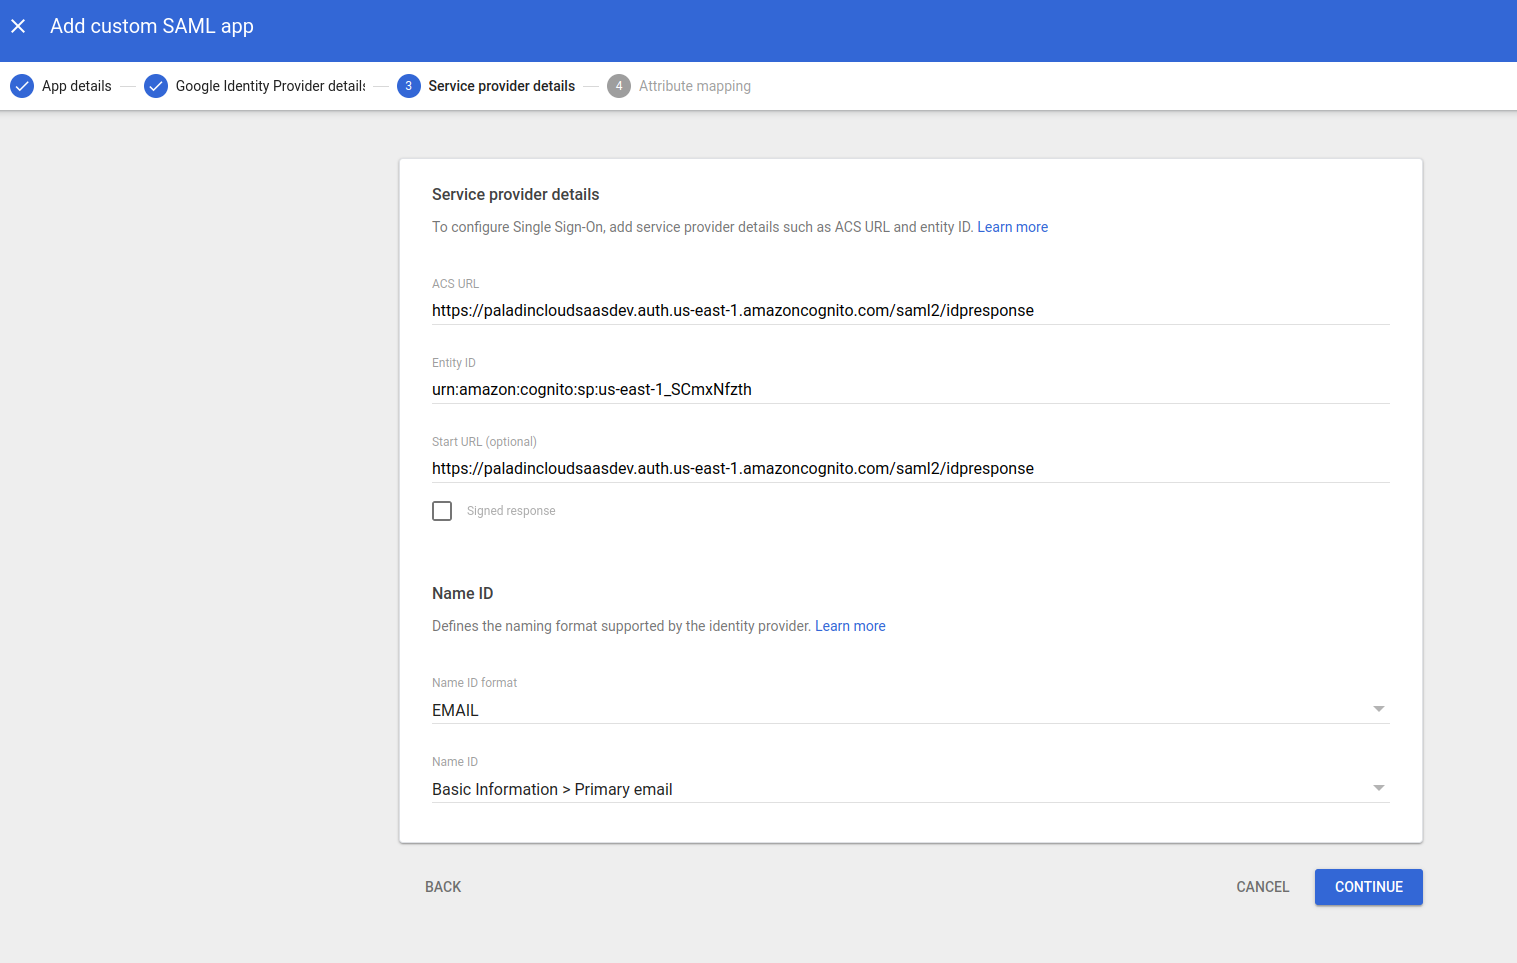
Note: ACS and entity ID are provided by PaladinCloud. These parameters will be used in Step 4 of creating SAML app.
Step 1:-
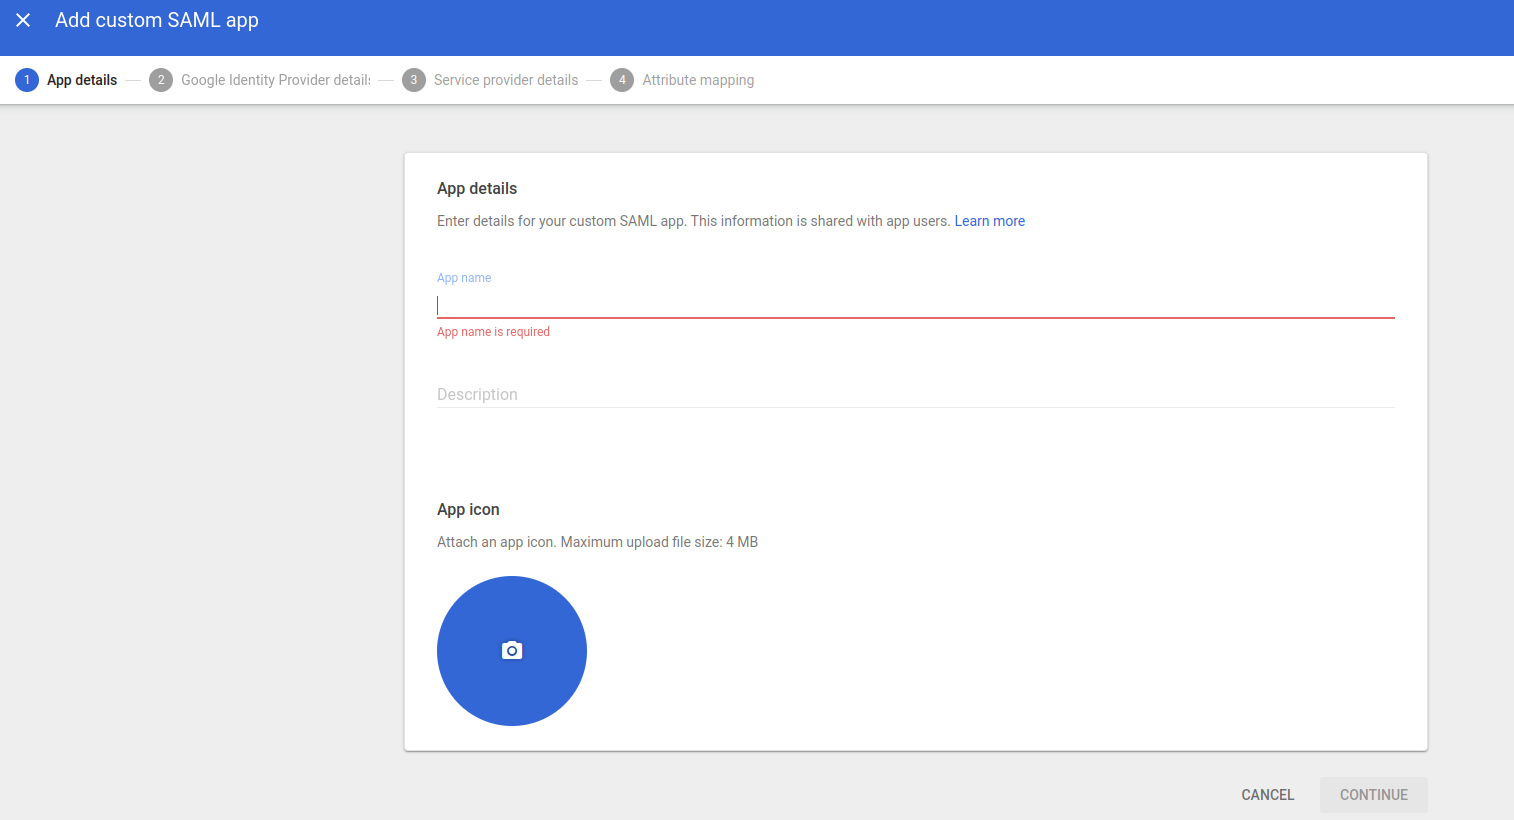
Apps –> web and mobile apps – – > Add app – – > Add custom SAML app

Step 2:-
Fill in the app details
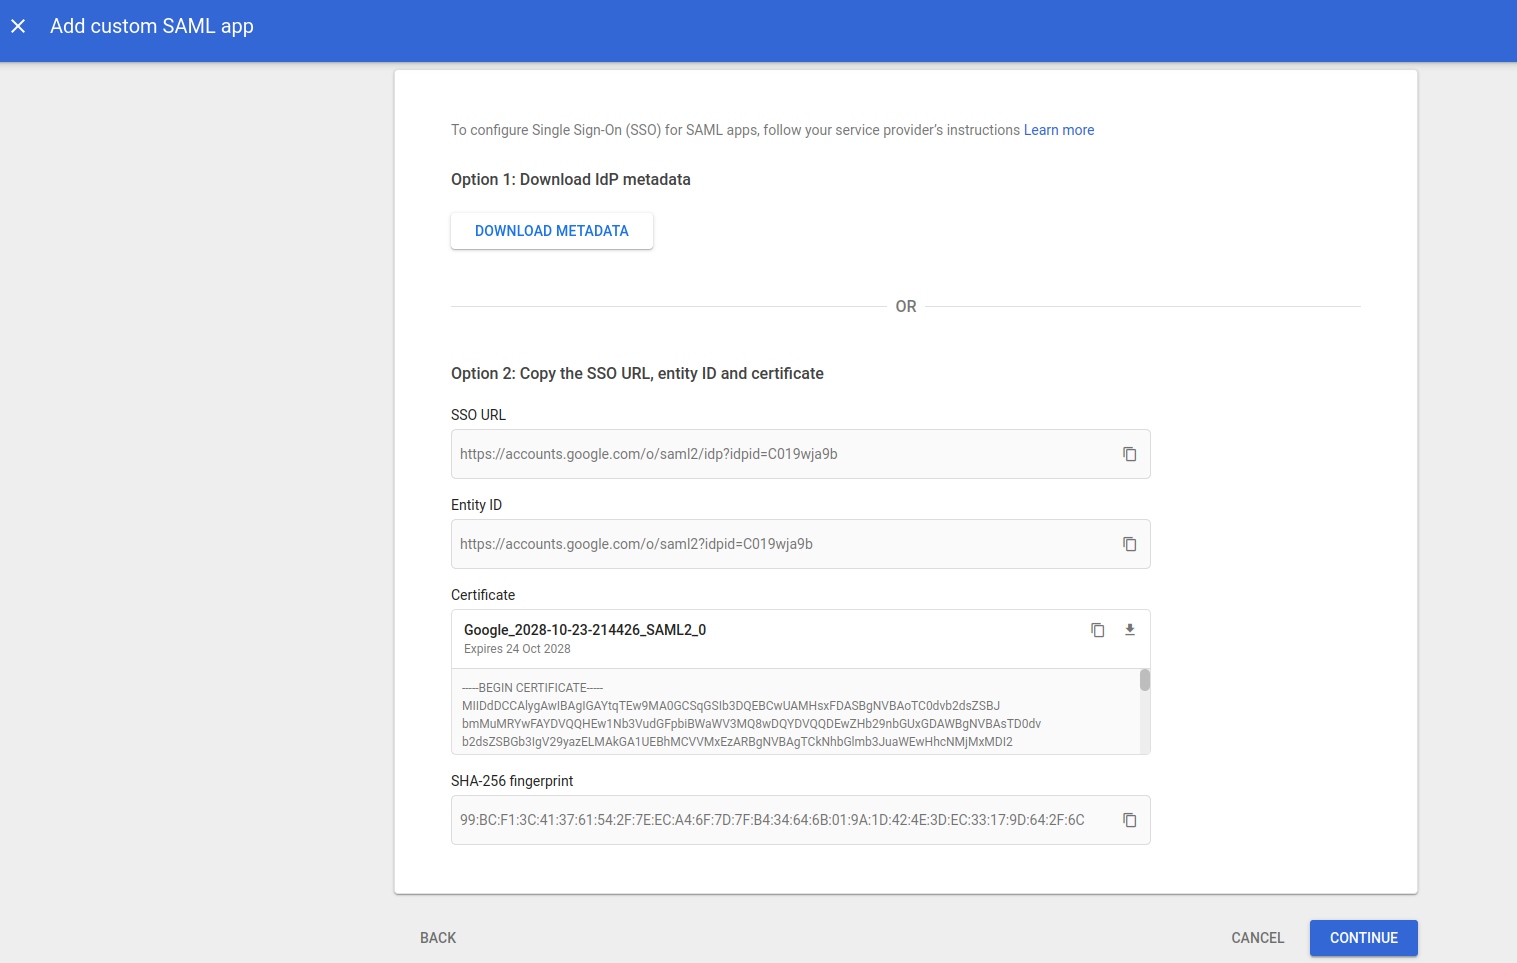
Step 3:-
In this step download the METADATAFILE to be provided to the PaladinCloud Team
Step 4:-
Update ACS and entity ID which is provided by PaladinCloud Team.
Step 5:-
Update App attributes and the groups as shown below

-
Primary email (http://schemas.xmlsoap.org/ws/2005/05/identity/claims/email)
-
First name (http://schemas.xmlsoap.org/ws/2005/05/identity/claims/firstname)
-
Last Name(http://schemas.xmlsoap.org/ws/2005/05/identity/claims/lastname)
- AccessID
– Provided by the Paladin Cloud Team
Google Groups:-
-
AccountManager
-
ReadOnly
-
TechnicalAdmin
-
SecurityAdmin
App attributes for the group is (http://schemas.xmlsoap.org/ws/2005/05/identity/claims/groups)
Once the above values are updated click on FINISH
Step 6:-
Click on user access in service status and select ON for everyone as shown in the below diagram

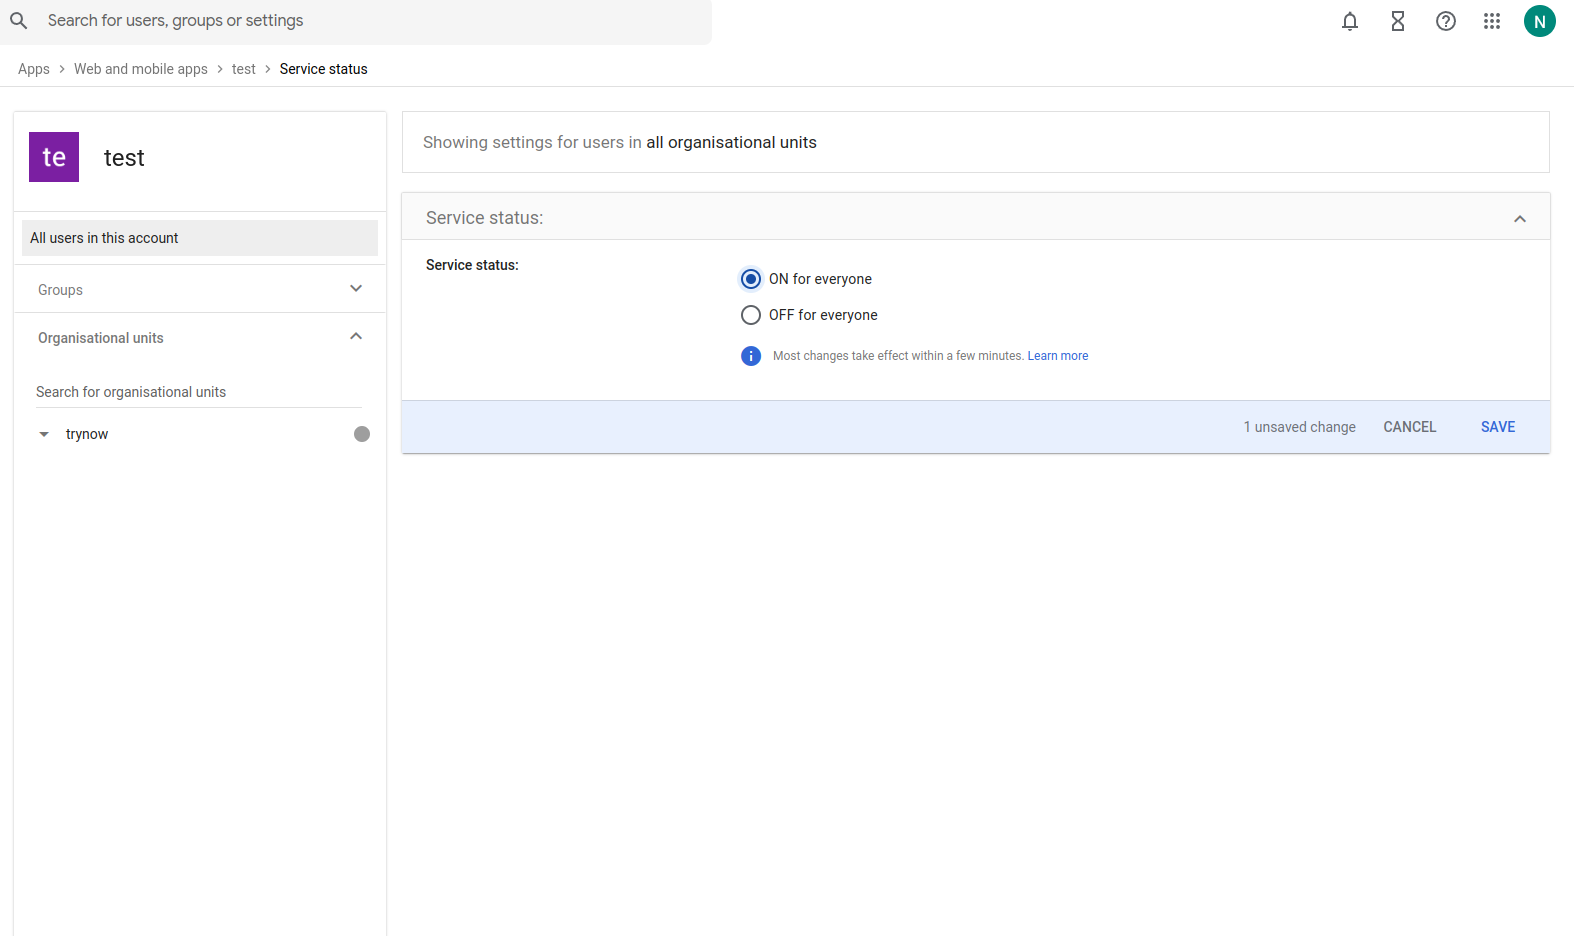
Once the above steps click on Save
This would complete the Setup for SSO and can be tested once the Paladin Cloud team installs the Metadata file on their side.