Set Up Azure AD Authentication with Cognito User Pool
Cognito can serve as an identity broker for Azure AD, allowing users created in the user pool to log in to the application. The following steps are required to set up Azure AD authentication with Cognito:
- Create an enterprise application in Azure AD for AWS Cognito.
-
- Create app roles and provision roles to the users.
- Configure Azure AD as an identity provider in local.py.
Create Enterprise Application in Azure AD for AWS Cognito
Cognito user pool details for Azure AD setup: Note the user pool ID and domain prefix for the Cognito user pool setup.
Format for Identifier (Entity ID): urn:amazon:cognito:sp:<yourUserPoolID>
For example, urn:amazon:cognito:sp:ap-southeast-2_nYYYyyYyYy
Format for Reply URL: https://<yourDomainPrefix>.auth.<aws-region>.amazoncognito.com/saml2/idpresponse
For example https://example-corp-prd.auth.ap-southeast-2.amazoncognito.com/saml2/idpresponse
Your domain prefix: The same domain name should be used in local.py for redeploy
Please Copy the Cognito user pool ID and keep the identifier and reply URL ready as per the above steps.
- On the Azure portal, go to Azure Active Directory.
- On the sidebar, select Enterprise Applications and create a new app.
- On the Browse Azure AD Gallery page, choose Create your own application.
- Enter a name for your application and select Integrate any other application you don’t find in the gallery (Non-gallery).

- Once the app is created, go to the Getting started page, and in the Set up single sign-on tile, choose Get started.
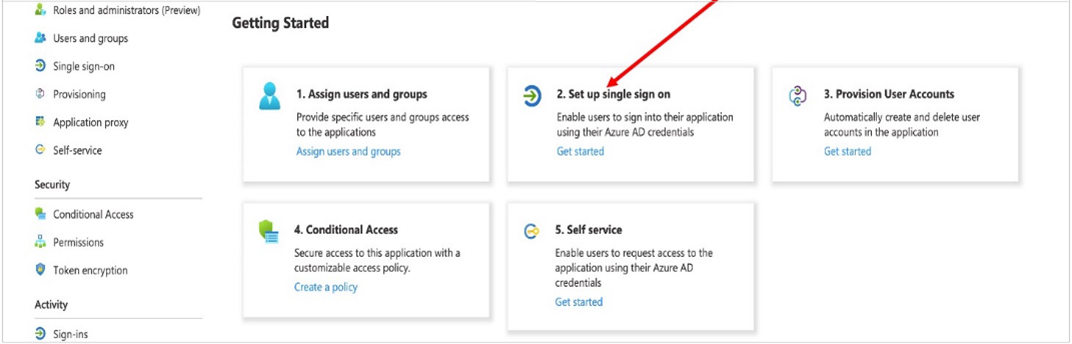
- On the next page, select SAML.
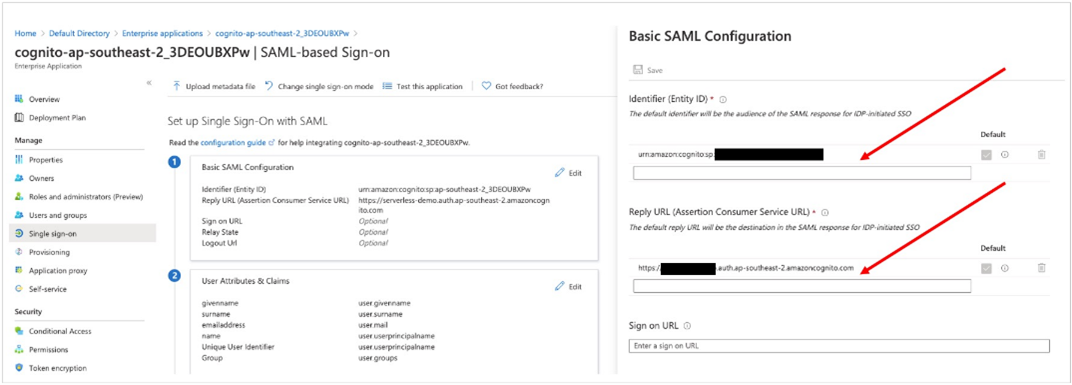
- In the Basic SAML Configuration section, choose the Edit icon and replace the default Identifier ID (Entity ID) with the Identifier (Entity ID) you copied previously.
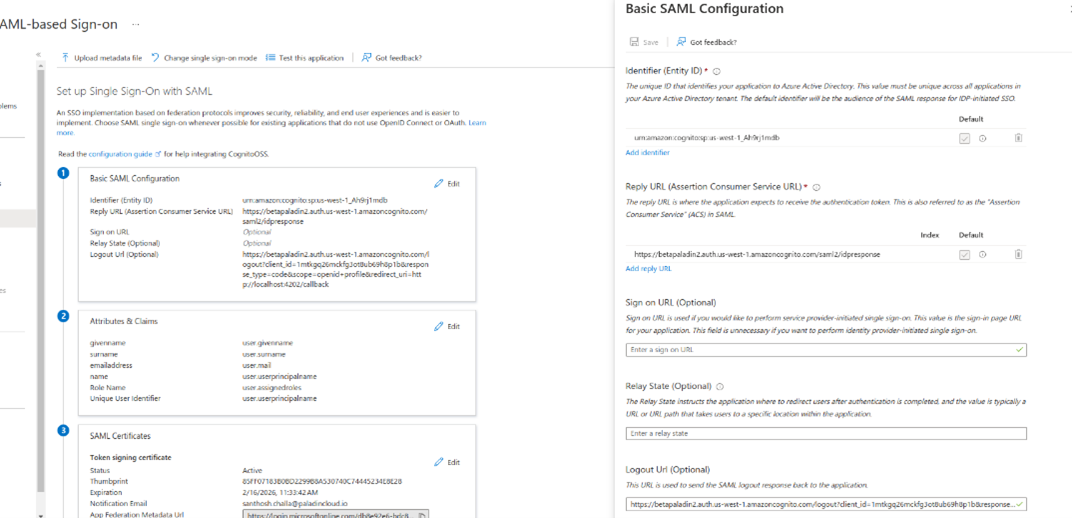
- In the Reply URL (Assertion Consumer Service URL) field, enter the Reply URL you noted previously.
- Set the Logout URL as
<COGNITO_DOMAIN_URL>/logout?client_id=<COGNITO_APP_CLIENT>&response_type=code&scope=openid+profile&redirect_uri=<PALADIN_UI_URL>/callback.
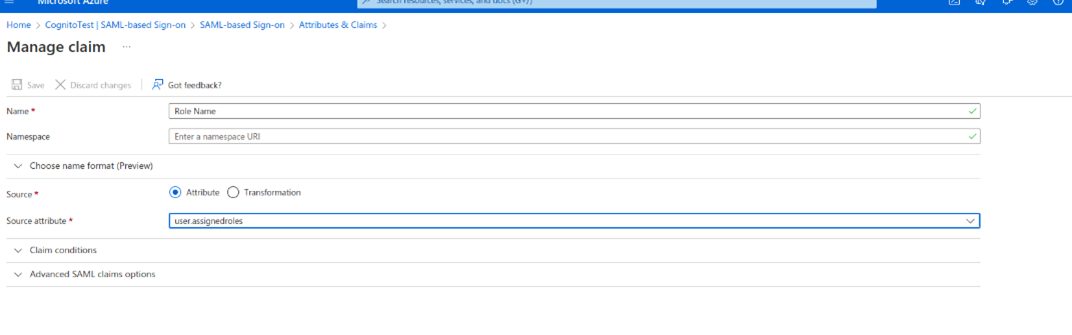
- In the User Attributes & Claims section, choose Edit and Add new claim.
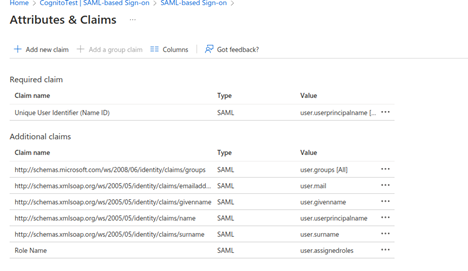
- Give Role Name as the name of the claim, leaving the namespace blank, and select user.assignedroles as the source attribute.
- Scroll down to the SAML Signing Certificate section and download the Federation Metadata XML.
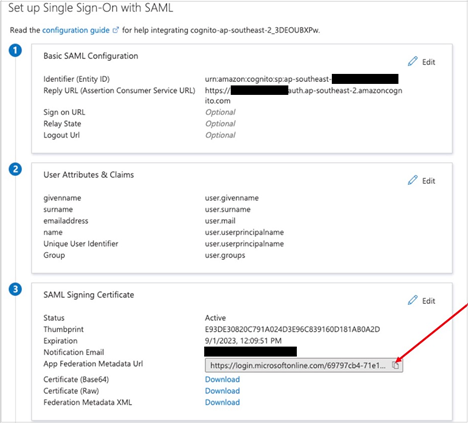
- Copy the contents of the XML file, as it will be entered in local.py.
Create App Roles and Provision Roles to the Users
- Go to Azure Active Directory >> App registration.
- Select the app registered in the previous step, and on the side panel, select App roles and click Create role.
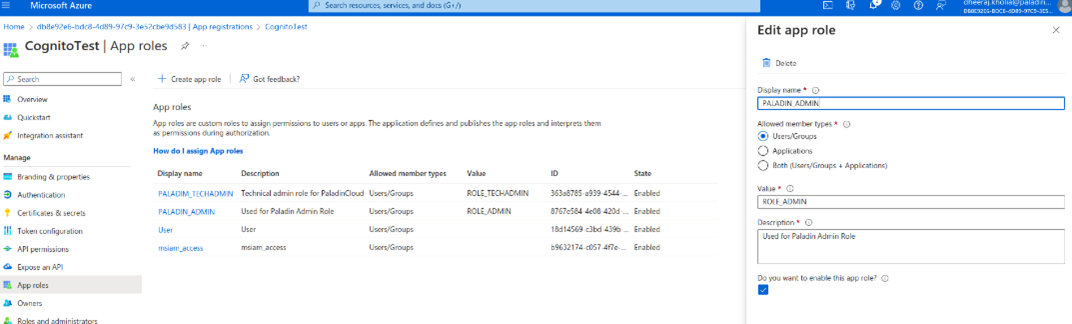
- Give a display name and select Allowed member types as Users/group.
- In the value field, enter ROLE_ADMIN, which will act as an admin role for the Paladin Cloud.
- Create another app role with the same configurations as above but value ROLE_USER, which will be the default read-only user for Paladin Cloud.
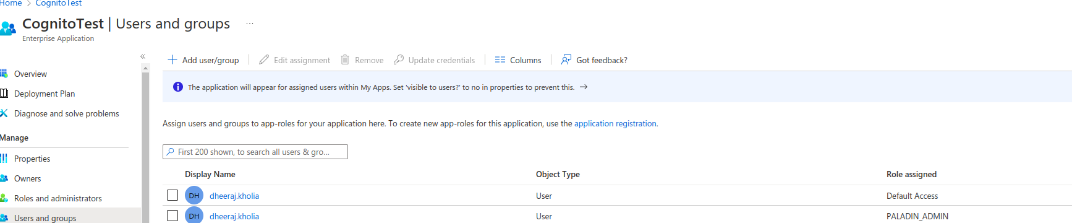
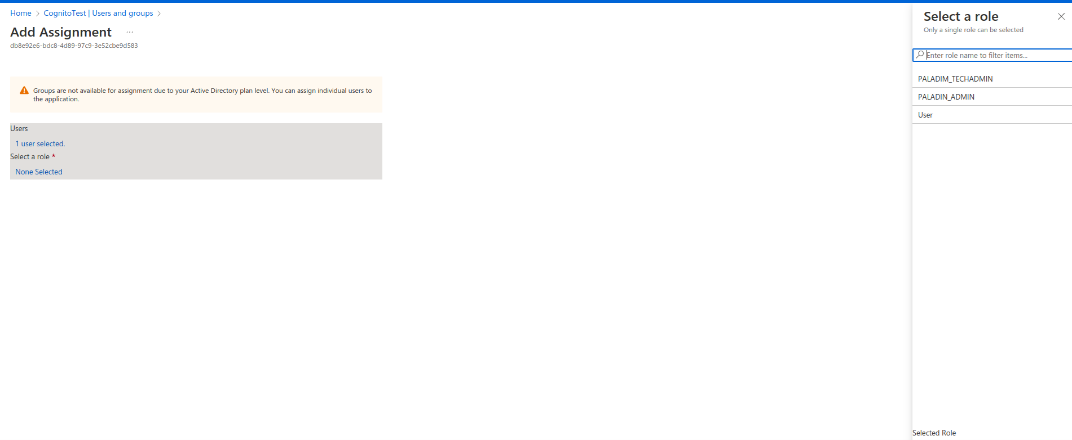
- To assign these roles, navigate to Azure Active Directory >> Enterprise App and select the app that was created.

-
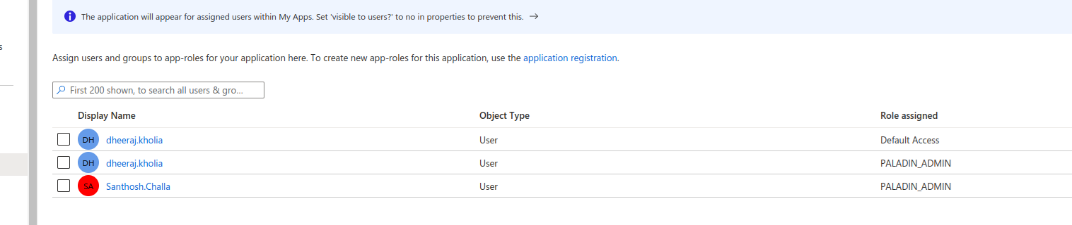
On the side panel, select Users and groups and click Add user/group.
-
Select the users and roles that should be assigned.
Configure Azure AD as an Identity Provider in local.py
- Connect to the installer machine.
- Edit the Setting/local.py file.
- Under #AZURE_AD_CONFIGURATION, add ENABLE_AZURE_AD = True and METADATA_XML_FILE =
""" """ - Copy the metadata XML file contents into the METADATA_XML_FILE variable.
- Run sudo python3 manager.py redeploy from the installer folder if upgrading to 2.0.0 from previous versions.
- Run sudo python3 manager.py upgrade if configuring AD only.