Select AWS Authentication Mechanism
This document describes the forms of the authentication mechanisms and the process of adding and selecting the chosen form of authentication mechanism.
Authentication information is added in the local.py before installation. To provide an authentication method in the local.py, you may choose from the following three forms of AWS authentication mechanisms:
- Key Pair Authentication (Using access Key and secret key)
- Assume Role Authentication (Assuming IAM role)
- Role Attached to EC2 (Using IAM role attached to the Instance)
Using Access Key and Secret Key
If you are following authentication mechanism 1 (Key Pair Authentication (Using access Key and secret key)) follow this step:
- Update the settings/local.py file with the following values:
AWS_ACCESS_KEY = "Type_the_AWS_Access_Key_Here"AWS_SECRET_KEY = "Type_the_AWS_Secret_Key_Here"
If you do not have Access or Security keys, you can obtain them in the AWS Console. Follow the steps below to generate the access and Secret keys:
- Go to the AWS Console.
- Click the down arrow beside the user name in the top right corner.
- From the dropdown menu, select Security Credentials.
- In the Access keys section, click Create access key.
- Select Third Party Service on the next screen as the access key type.
- Set a description tag.
- Click the Create button to generate the access and secret keys.
The access and secret keys will be generated and displayed on the screen. These keys are visible only once, so make sure to download the provided .csv file or copy the keys to a secure location.
Note: Keeping these access keys secure is crucial, as they provide access to your AWS resources and services. Treat them like passwords, and do not share them with unauthorized individuals.
Assuming IAM Role
If you are following authentication mechanism 2 ( Assume Role Authentication (Assuming IAM role)) follow this step:
- Update the settings/local.py file with the following values:
AWS_ASSUME_ROLE_ARN = "Type_the_AWS_Assume_Role_ARN_here"
Using IAM Role Attached to the EC2 Instance
If you are following authentication mechanism 3 (Role Attached to EC2 (Using IAM role attached to the Instance)), follow these steps:
Note: This document gives detailed steps on creating an IAM Role and attaching it to EC2.
- Log in to the AWS console where you have created the EC2 machine for Paladin Cloud installation.
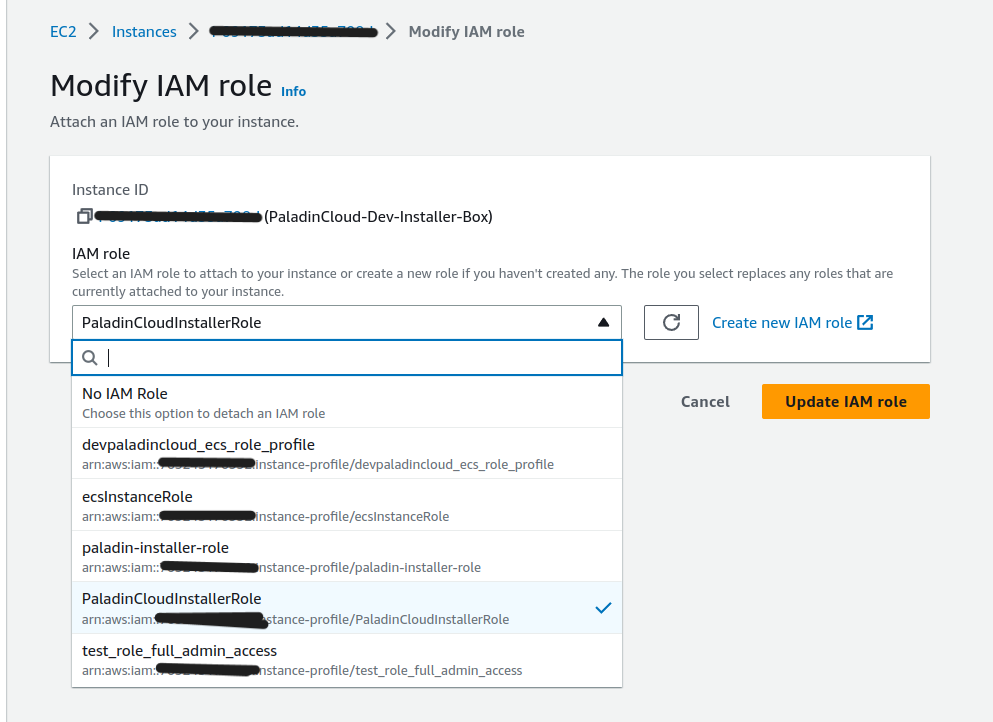
- Select EC2 instance -> Action-> Security-> Modify IAM Role.
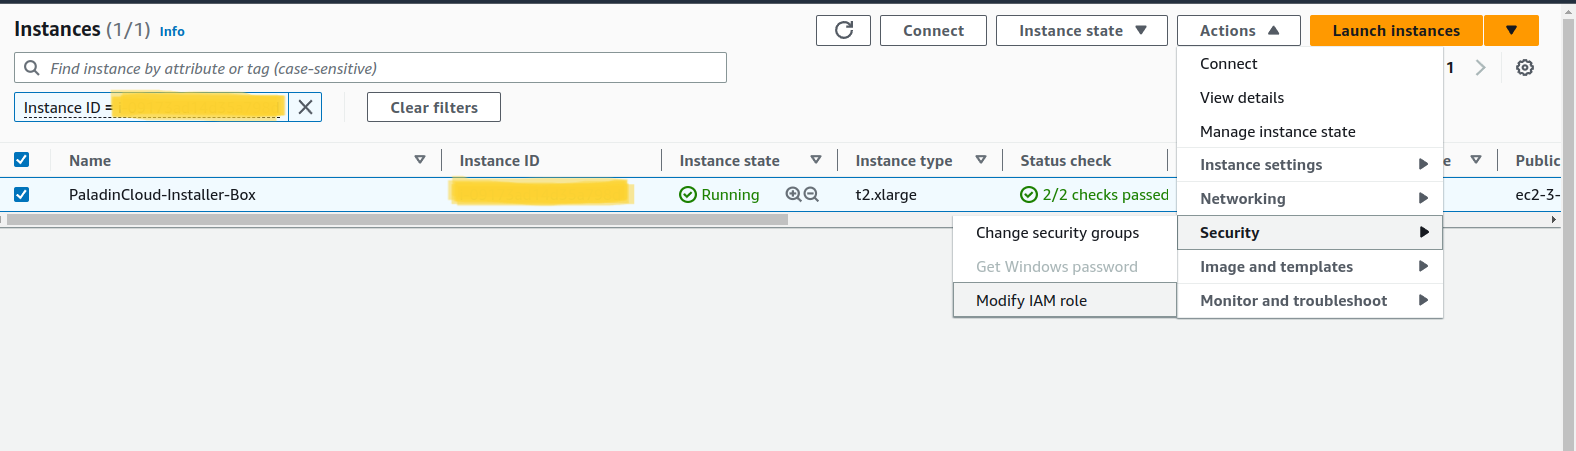
- Select the IAM Role and click Update IAM Role.
Selecting Authentication Type
You can update local.py with the respective authentication type. It will also be prompted during the Installation, as shown in the image below.
- Once you run the Installer command, it displays the Paladin Cloud Infra Setup and Deployment window.
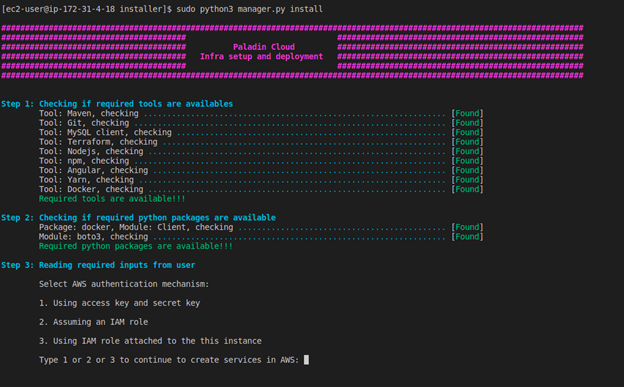
- Under Select AWS Authentication Mechanism, choose the authentication mechanism you want to use and type the corresponding number (1, 2, or 3) to continue creating AWS services.
Using the Access Key and Secret Key
If you have not updated the local.py with the access and secret keys values, you can do it on this screen too.
For selecting Using the access key and secret key,
- Type 1 and press Enter.
- Enter the region and press Enter.
- Enter the AWS access key and press Enter.
- Enter the AWS secret key and press Enter.

Assuming IAM Role
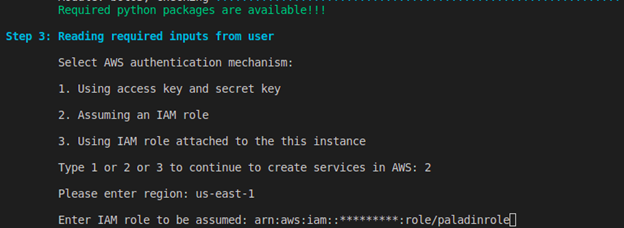
For selecting Assuming an IAM role,
- Type 2 and press Enter.
- Enter the region and press Enter.
- Enter the IAM role to be assumed and press Enter.
Using IAM Role Attached to this Instance
For selecting Using IAM role attached to this instance,
- Type 3 and press Enter.